A Woodworker’s Notebook
Jeff Gorman
How to Join Sanding Belts

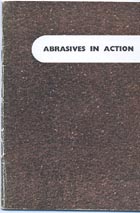
This advice has been gleaned from my elderly but undated, Oakey handbook 'Abrasives in Action' strongly recommends butt joints made at an angle anything between 60° to 45°.

The joint should be backed with 2in wide strip of thin linen or cotton glued with hot glue. I take this to mean Scotch Glue. 'Scotch' glue is an adhesive based on animal remains, known sometimes as 'Hide Glue'. Nowadays it is usually sold as 'Pearl Glue'. It has the advantage of being more flexible than some other adhesives with a fairly rapid 'grab'.

To prevent the cloth shrinking as it absorbs moisture from the glue and then puckering the joint, it should be pre-shrunk.

I called Titebond and their technician told me he advises Original Titebond glue. (which I believe is PVA yellow wood glue) he said hide glue is harder and when the belt first starts up and is cold it will have a greater chance to break.
Note fromPaul Kaczmarek
  • To get the right lengths, cut through a worn belt. Cut a strip a bit longer than necessary.
  • Make certain that in the area of the joint, the back of the belt is scrupulously clean.
  • With the aid of suitable battens, clamp the joint area to a cutting board with the ends overlapping by at least 1 inch.
  • Sight along the sides of the belt to see that they are in a dead straight line.
  • To ensure that the belt ends will have no gaps or frays, make sure that the cutting board area beneath the intended cut is not already scored by previous cuts. Using a wooden straight edge and a very sharp knife, cut with a quick swipe of the knife. It might pay you to practice on some scrap.
  • To be certain that your belts do not slip while you cut, it would be a good idea to also clamp the straightedge.
  • Working in a warm area, sparingly apply freshly made Scotch Glue to the back of the belts. A hair dryer or a carefully used hot air gun would be useful for warming the joint area.
  • Quickly apply the shrunken cloth and use a decorator's roller to ensure good gluing contact.
  • You can then apply a larger patch of similar material over the narrower one. Wait until the adhesive is thoroughly dry.
© Copyright 2019 - 2024 The Estate of Jeffrey M Gorman All Rights Reserved.
Website by Hillwalk Ltd
Site Version: 1.0.2