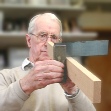

One can come across unspecific arguments about ‘Sawing to remove the line’ or ‘Sawing to split the line’ or ‘Sawing to the side of the line’.
What is best really depends on what tool made the line, and what the line actually indicates.
There are, of course, several ways you can scribe dovetails. Here, I’m using a pencil in the style where you make the pins first. (Using a pencil is more difficult when you make the tails first).
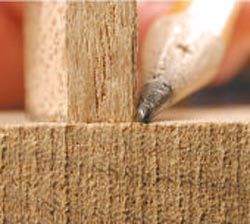
I chose a slightly blunt pencil to show that the width of the pencil line does not unduly matter, just as long as you remember that for a conical marking tool, the important side of the line will lie slightly outside the footprint of the end of the pin.
In this instance, I used the method that uses waste at the ends of the workpieces.
Note:A snag with the pins-first style is that when you saw the sockets, you must work from the inside face of the workpiece. It is really desirable to work so that you are watching the outer face, the face that the world will see. In tails-first mode, although this need not apply work on the show face.
As the pencil finishes its stroke, it flicks away from its guide and leaves a curved end to the mark.

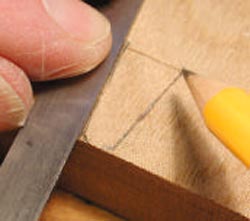
To be able to square the line across the end of the job, you need to extend the mark to the very end of the job, ie gently over-mark it.
Strongly resist the temptation to make it bolder and therefore wider.
It is all too easy to strike a line and discover too late that it wasn’t quite where it was intended it to be, so make a tick where you think the line should start, move the square to the side and check whether you have got it right.
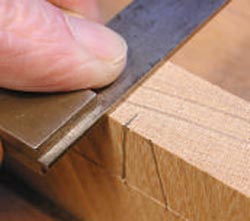
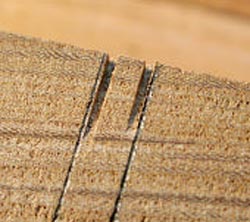
Start sawing at the far corner.
Saw at a gnat’s whisker away from the inner edge of the line. The right-hand kerf is just right, the other is a shade to far away from the inside of the pencil line.
Actually, the joint fitted without any tweaking.
There are advantages in starting a saw cut at the corner furthest away from you. Some people start on the front corner, but this means that you have to start with the saw exactly aligned so that it matches both the horizontal line and the line on the vertical face. Unless you are in practice it is just too easy to get one of them wrong!
When you work this way, you can get a good start with the kerf firmly established in the waste. As you continue to saw and gradually drop your arm, you first have to watch the horizontal and then the vertical line - not both at the same time.