A Woodworker’s Notebook
Jeff Gorman
Some Unusual Dovetails

Bored with woodworking? Then try one of these…

I got the urge to try one after seeing a photo of a Spanish chest. I've since seen a description of one in Fine Woodworking magazine (Issue 35, August 1982) where they were called (I think) Bermudan Dovetails. The style is said to be of medieval Moorish origin.
Prior to shaping, the pin-bearing board looks like a common lap dovetail. The adjacent face looks just like a set of through dovetails. Out of habit, I made the trial joint without waste on the ends of the pins, but with hindsight it would have been better to have had a sixteenth of an inch or so of waste.
Start with upward sloping chisel cuts (see left of pic) working down to the gauge line. Then pare horizontally as near to the awl marks as you dare. Nerves of steel are obligatory. Work to just leave the awl pricks showing
Alternately paring vertically and horizontally, fiddle the profile as best you can with paring gouges and chisels. Check that the rebate floor is at right-angles to the vertical face.
Part of the joint assembled, prior to gluing up.
The awl marks (fortunately) swelled tight again after the glue squeeze out was washed from the outside surfaces.
Though it might not look so, the end-grain is slightly lower than the upper surface of the workpiece.are. Nerves of steel are obligatory. Work to just leave the awl pricks showing
Stage 1

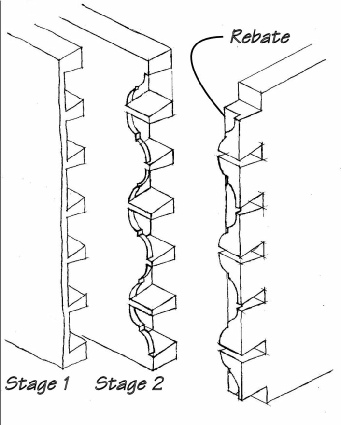
It is probably preferable to make the tails first, just as you would do for a common through dovetail joint.

Scribe and saw the pins more or less in the usual way. Note that some cuts should be shorter than others, ie they do not reach the shoulder line of the tail socket floors.

Make the tail sockets just like an ordinary lapped (blind) dovetail.

Stage 2

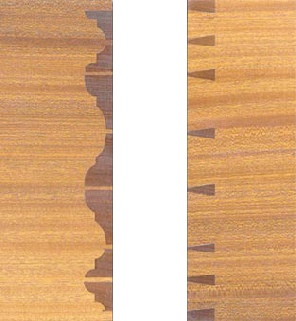
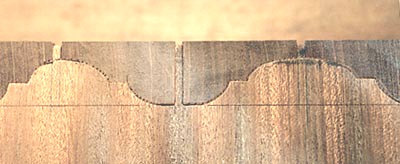
Prepare a template for the curved shape. It must have a baseline indicating the location of the tail socket floors. Precisely locate the template and scribe the shaped lap from the template. Use a jeweller's saw to rough out the curve. Since using a chisel would be rather tricky, finish with fine files, taking care not to fray the edges. This profile must exactly match the template. If you go a bit too far, alter the template to match your curve.

Stage 3

Offer the pin bearer to the socket bearer in the usual way and cut the sockets.

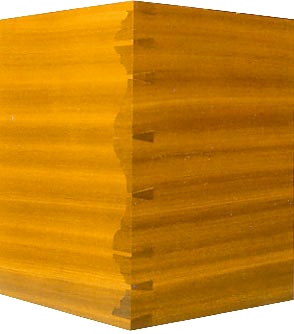
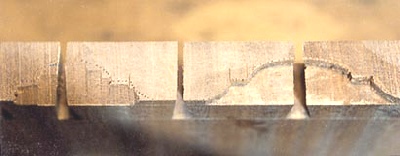
Note that at this stage the design allows the pins to just enter their sockets. Assemble the joint as well as you presently can.

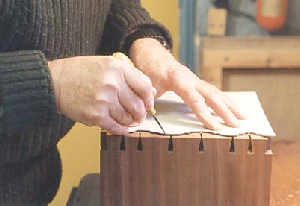
Using a magnifier, locate the template absolutely dead above the face side of the tail bearer and with a sharp awl prick out the curve.

Stage 4

Pare the end-grain rebates to match the awl marks.

© Copyright 2019 - 2024 The Estate of Jeffrey M Gorman All Rights Reserved.
Website by Hillwalk Ltd
Site Version: 1.0.2