
On which side should a marking knife be bevelled?
Many of the marking knives available from run-of-the-mill suppliers have the blade ground (when viewed from the operating position) on the right-hand-side
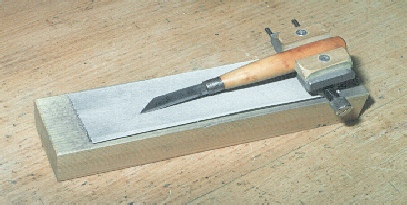
These knives have been re-ground. To gain a wide bevel, a small grinding bevel has to be used, hence there is a very narrow bevel honed on the opposite face to give a stronger edge
The upper knife has its uses in marking dados and suchlike. I don't like it very much
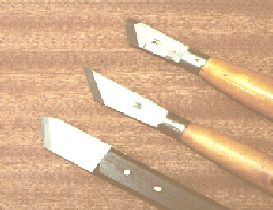
The round-handled knives are about 3mm (1/8in) thick near the ferrule, tapering to about 2mm at the start of the bevel. The edge makes an angle of about 40° with the longitudinal axis, but ideally this should give a 10° to 15° clearance angle with the top of the workpiece, according to your height, bench height and so on.
The grinding angle should be as small as is reasonable, the idea is to form as wide and as visible (from above) a bevel as you can.
Probably a 'backface' bevel will be needed because most steels will not survive too low an angle. Do not create a sharpening bevel on the grinding bevel.
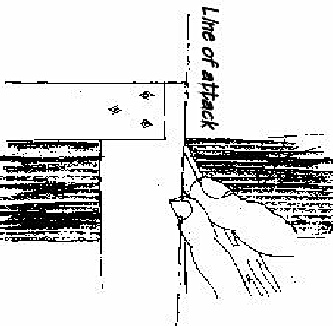
The worker's eye view of a knife with the bevel ground on the 'inside'.
The drawing intends to show the bevel vertical to the surface of the workpiece. The broader the bevel, the easier it is to see.
If the knife is slightly turned inwards as indicated by the chain line (labelled 'Line of attack') the knife's edge will steer itself into the blade of the square and keep it from wandering, as can so often happen.
When squaring say, a shoulder, we want one side of the cut to be square to the surface, with the sloping, crushed side in the waste.
To do this with a knife bevelled on the right-hand side means that if the line is to be directly below the right eye, (where it should be), the wrist will have to be held at an unnatural angle and your upper arm and elbow will probably rub against your side, especially if you are a bit "dimensionally challenged".
Try grinding a wide bevel on the left-hand side of a fairly thick blade and hold the knife sloping outwards but with the bevel vertical. The wrist should now be in a more natural position, offering greater control.
Life ain't all that simple though. Consider marking the limits of a housing (dado). Unless you turn the wood round, or work left-handed with a left-handed knife, the leftmost line will be crushed on the wrong side
For more detail, look atAn Aspect On The Bevel
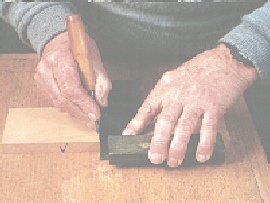
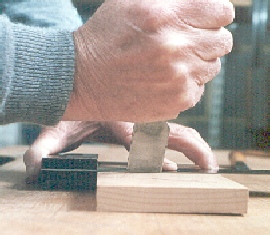
Instead of a marking knife, some old hands use a very short sideways-tilted 25mm (one-inch) chisel with the bevel against the square.
By the way, note how the square is grasped, the location of the index finger and you'll see why I prefer to use a marking knife.
Unless you have a water-cooled grinder, it is very easy to overheat and soften the very point.
To grind the bevel I used a fairly coarse abrasive paper stuck to glass, and then re-worked the entire bevel with finer paper to form a sharp edge without a honing bevel.
A small bevel has been honed on the other face, otherwise the angle of the edge would have been too acute for a durable edge.