
Please note:This describes a fairly standard cabinetmaker's approach to mortising by hand.
It avoids the drilling and paring sometimes recommended - a technique really required for wider mortises in hard woods where the mallet would be inadequate.
However, it rarely produces the smooth flanks required for good adhesion. (It is a mistake to assume that rough surfaces glue best).
Practice makes perfect50mm x 25mm (2" x 1") stock planed to 45mm x 22mm (1¾" x 7/8") should be about right.
If you really want this to work, the face side and the face edge must be prepared true and accurate.
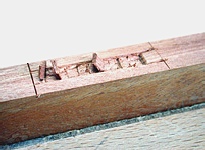
Although the illustration shows them, knife lines do not need to cross the face of the horizontal of the 'Tee' - see the note below. The aim is to avoid having to plane them out at the cleaning-up stage.
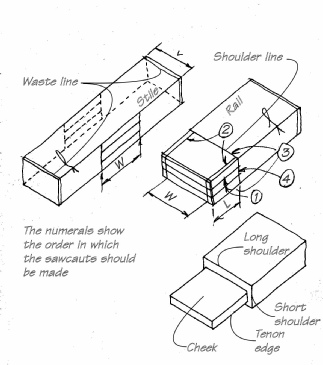
Procedure:On the face edge, find the mid-point of the longer piece and measure half the distance 'W' each side of the mark
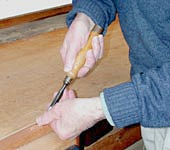
Using a try square with the stock against the face side, scribe two lines.
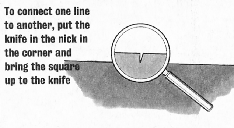
Mark the opposite edge (square still against the face side) by following the advice on the right and knicking the arris of this edge only.
You can then use these knicks to locate the two lines for the opposite edge.
An adjustable mortise gauge is not as essential as you might think. SeeMake Your Own Gauge.
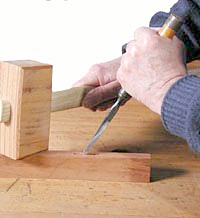
You can now hold the work down with the mallet head and using only one hand, locate the chisel into the groove.
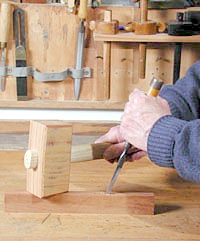
Stand at the end of the bench so that the workpiece is supported more or less over a leg.
For this demonstration, the chisel is vertical with the chisel bevel facing the centre of the mortise.
(See:A Commentary on Alternativesfor alternative ways of doing this)
This is what you should see. Note that the job is aligned straight ahead of you. Adjust your hand sideways until the chisel appears to lie along the central axis.
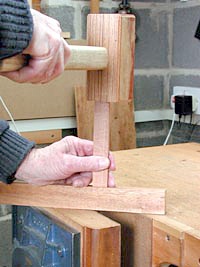
Bring the mallet into position. While doing this concentrate on keeping the chisel located. Put the mallet on the chisel end and re-check that it is vertical. Press downwards on the chisel.
Raise the mallet and strike. Don't try to go too deep. (Use other violent/non-destructive ways of working out your feelings against your boss, or whoever). If the chisel should be slightly awry, the error will be less than it would be for a deep cut. You should get a better finish on the mortise flanks if you go fairly gently.
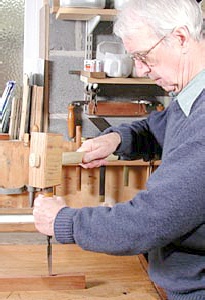
You can hold the workpiece with the mallet head while you pull the chisel straight back.
Pull the chisel out. (Watch your chin while you do this).
Back to square one, until you are about a mortise-width from the end. Observe the end of the mortise after you have levered back.
Turn the chisel round. Starting in the centre again, work towards the other end. Again stop short of the end.
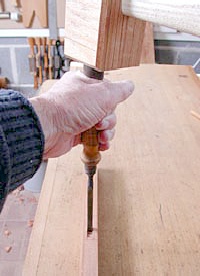
Securely fix the workpiece and scoop out the waste with a downwards movement of the right hand while you lift with the left.
When you reach the end of the mortise, you will be just scooping with the chisel and using the end of the mortise as a fulcrum.
To avoid any further levering against the mortise ends, use a slip of hardwood (thickness equal to the width of the tenon) to clear out the remaining waste.
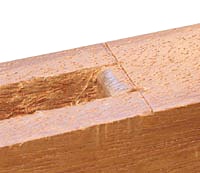
As the chisel levers against the end of the chopped section, the corner becomes rounded. Removing the round is the last job in mortising.
Finally:Continue until you are about half-way through.
Clean the bench top. If chips get between the work and the bench top, they will make a mess by denting the job.
Turn over and work from the other side.
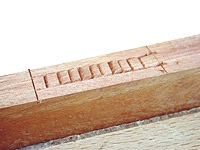
Clean up the mortise ends, chopping exactly to the marks. Use a rule to check that the ends are not convex, but when correcting, try not to undercut.