
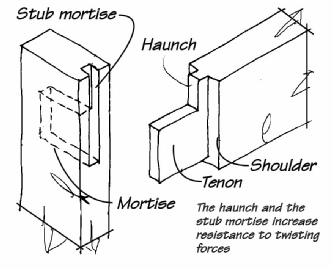
The haunch is the part that lies between the top of the tenon and its rail or the wood between the end of the mortise and end of the stile.
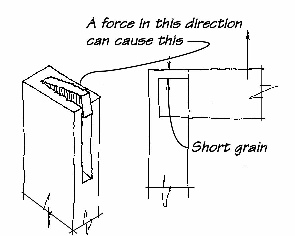
The haunch is usually made about 1/3rd of the width of the tenon, if too narrow, its grain will be too short, and therefore weak.
The illustration shows a probable result of a force applied in the direction of the arrow. This is most likely to happen as a mishap in handling the work, including trial fitting rather than once the joint is glued-up.
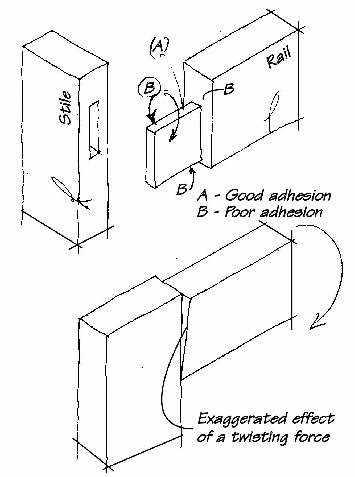
Upper left:Note that we only get good adhesion from the flanks of the tenon and mortise (but seeFinish of Mortise Wallsfor comments on mortise and tenon adhesion).
Lower left:On this plain joint, the shoulder's end grain offers very poor bonding, hence the good chance of the rail twisting slightly (most likely during final assembly).
The stub mortise is introduced to limit the twisting tendency.
Where the stile is grooved, a hand plough needs to run from end to end of the workpiece, so a stub haunch is needed to fill the groove.
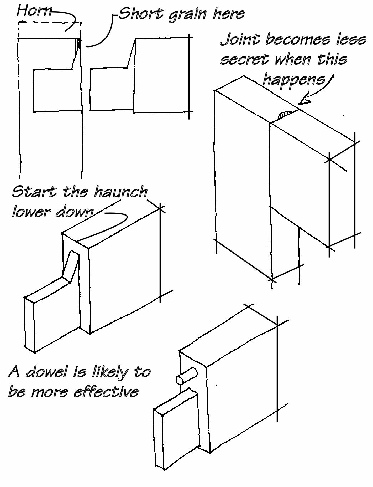
Where the top of a frame is visible, most books will tell you to make a sloping haunch as illustrated. This might look OK until you clean away the end grain and find that with some woods, the action can rip out some of the short grain near the haunch (indicated by a not-very-evident shaded area).
One dodge is therefore to form the slope as suggested, or to substitute one or two small dowels instead.
Novices might appreciate the warning that it is all too easy to remove the tenon flanks too soon and thereby lose their gauge and knife marks.
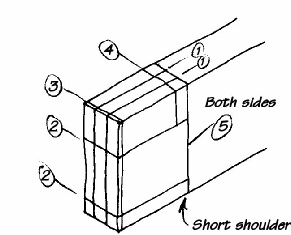
Start by sawing both flanks (lines numbered '1') and follow the sequence indicated by the numerals 2, 3, 4 & 5.
