
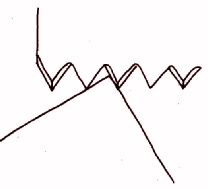
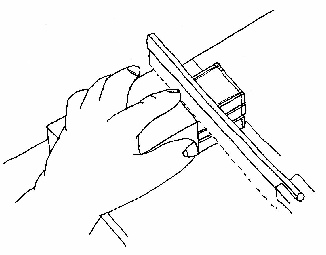
Left:To start a cut on top of a corner means that the corner will fit inside the teeth gullets and the saw will be very difficult to start. There's a good chance that it will jump away from your intended start point.
Right:The secret is to start with a very low approach angle, applying a very light downwards touch, guiding the saw with the side of the thumb against the plate of the saw.
Marking Out:Use the same setting of the gauge points as for the mortise.
Take care to always run the gauge against the face side of the workpiece. If the mortised piece is the same thickness as the tenon piece, there should be no need to adjust the setting of the stock.
Adjustable mortise gauges are not as essential as you might think. SeeMake Your Own Gauge
When scribing the shoulders, bear the try square's stock acgainst either the face side and face edge of the job. If correctly marked, the lines should run right round the work without any gap between the starting and ending points. See:Face Side and Face Edge Marks (Datum)

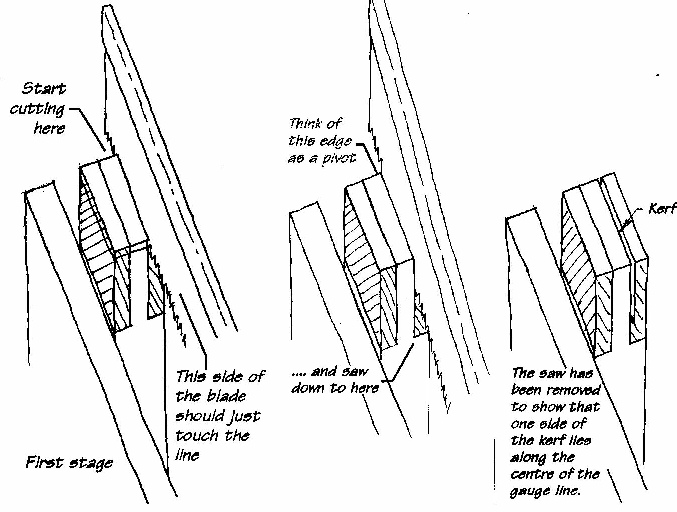
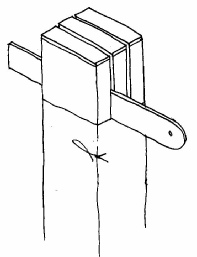
Left:Shows the tenon in the vice. The cut was started at the furthermost corner of the workpiece, the saw handle lowered until the kerf occupies the waste wood. Note that the left-hand side of the saw's plate brushes the centre of the gauge line.
Middle:The saw half-way down a cut that will go from the far corner to the shoulder line.
Right:The saw has been removed to show how the kerf aligns with the gauge line that marks one cheek of the tenon.
Saw the other cheek. Turn the work round and repeat, still working only from corner to corner.
Finally complete the cut with the saw running parallel to the shoulder lines.
It can be important to be sure that there is not a hump of wood that might prevent the cheek falling away when the shoulder is sawn. This is the cause of many a weakened tenon caused by cutting the shoulders too deeply.
Right:Check by slipping a ruler into the kerf.
All the down-grain cuts should be made before sawing the shoulders.
Make sure that the shoulder lines are knife-cut with the bevel of the knife vertical (see Marking Knife ) and cut as deeply as you can.
Some people recommend that you chisel a groove into which the saw can fit, but I reckon that this is not half as good an idea as some think.
Take care not to saw too deeply, see the advice above.
When sawing the short shoulders, avoid scarring the ends of the long shoulders. (Easier said than done!)
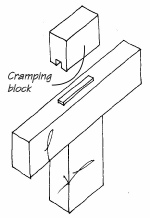
Joints should be cramped with the centre line of the cramp aligned with the centre lines of the workpieces, so a special block will be needed for the cramp shoes to bear upon.
If you have much waste projecting above the surface, prevent breakout by bevelling the ends of the waste. If breakout goes too deep, it can show on the finished job.
Check the flatness of the cheeks. Rectify any errors by chiseling across the grain.
In the event of a serious error, such as sawing on the wrong side of the line, don’t consider gluing veneer to the cheeks to make up the loss. This will still leave you with a weak tenon. Consider instead using false tenons as described at:Repair of Undersized Tenons
You might be able to correct irregular shoulders by using a mouse. Please seeMarking Gauge Tipsbut on a framed job, you will need to shorten similar shoulders by the same amount.